
A Step-by-Step Guide to Baking the Perfect Loaf of Bread with High-Protein Flour
Introduction
Something about the smell of freshly baked bread in a kitchen never fails to be comforting to everyone. That crackling of a golden crust, the soft crumb content, that feeling of achievement when you cut your own homemade loaf, there is nothing like that in baking, and one more important ingredient of every great loaf is high-protein flour. To know more, click on cake flour. This article provides a general overview of by step-by-step guide to baking the perfect loaf of bread with high-protein flour.
Steps to follow while baking the perfect loaf of bread
Collect all Quality Ingredients
To make one regular loaf, an individual will need:
- 500g high-protein flour
- 350g lukewarm water
- 10g salt
- 7g instant yeast
- 15g of olive oil or butter (optional, to make it soft)
Good bread is based on quality flour. Use a fresh, new milled brand, which is better in texture, taste, and smell.
Mixing and Hydrating the Dough
Add flour and approximately 90 percent of your water into a large mixing bowl. Combine until all the dry patches are absorbed – you are not kneading at this point, just making sure that the flour is evenly wet. Allow the mixture a half-hour rest. The rest will already begin to make the dough smoother and cohesive. Then, put in the yeast, salt, and the rest of the water. Combine until the mixture holds.
Kneading
Kneading is how you develop strength and elasticity in your dough. You can knead your dough by hand on a clean surface or using a stand mixer fitted with a dough hook. If you’re kneading by hand, push the dough forward with the heel of your hand, fold it back towards you, and rotate it. Continue kneading the dough this way for about 8 to 10 minutes. You want the dough to be smooth and slightly tacky, not sticky.
The First Rise (Bulk Fermentation)
Put the dough into a lightly oiled bowl and cover it with either a damp cloth or plastic wrap. Let it rest in a warm place for 1½ to 2 hours until it doubles in size. During this time, the yeast is fermenting the sugars in the flour, which produces carbon dioxide and helps develop flavor.
Shaping the Loaf
Once doubled in size, gently punch down the dough to release excess gas and turn the dough out onto a floured surface. Shape it as you like, whether it be round (boule), oval (batard), or rectangular for sandwich loaves. To shape your dough, fold each of the edges towards the middle of the dough to create surface tension while tucking them under itself. Put the shaped dough in a greased loaf tin or proofing basket, seam side down.
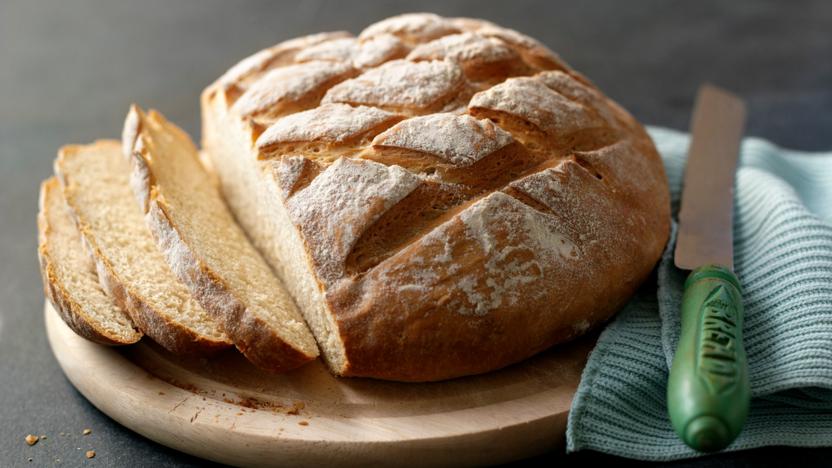
Scoring and Baking
While the bread is proofing, start preheating your oven to 230°C (450°F). Place a small tray of water at the bottom of the oven to dišseminate steam. The steam keeps the crust flexible during the oven spring, allowing for the last moment of expansion, resulting in that classic glossy crackly finish. Bake for approximately 35-40 minutes or until the loaf is deep golden brown and sounds hollow when tapped on the bottom. If you’d like to check for doneness, the internal temperature should be between 96 and 98 degrees Celsius.
Cooling and Slicing
While this last step may seem insignificant to some people, I assure you that they are critical to maintaining the quality of your bread. Once the loaf has been removed from the oven, transfer it onto a wire rack and let it cool for a least one hour, making sure to give it time to recover from the heat. Cutting into the loaf too soon, before it has fully cooled, can trap excess steam, thus resulting in a gummy crumb.
Conclusion
The perfect loaf of bread comes from the science of the yeast process and the soul of the baker. You may not realize it, but the high-protein-flour bread process, just the right techniques, and a very small portion of patience will soon turn your kitchen into a bakery, scented with the delicious aroma of fresh bread, which you will make with your own hands.